Repairing a Zanussi dishwasher
I am not someone who has a natural affinity for fixing stuff.
But with a move to France in the offing, and the loss of income that will come with it as I resign my job and try to start a new business, the ability to fix things becomes more important as a vital money-saver.
As such when our trusty Zanussi dishwasher (standalone model ZDF26011WA - I’ve put that here in case anyone ever needs help in doing the same thing!) developed a fault recently I took the plunge.

We paid about £325 for the machine 7 years ago in December 2015. It’s not put a foot wrong in that time and does the job perfectly; and at that price it was excellent value. Zanussi are an Italian manufacturer, but the company is now owned by Electrolux (they also own AEG) - and so the quality level of their products, which are usually cheaper than the parent, is usually excellent as they share parts.
I noticed the fault because the dishes were coming out still very wet at the end of a cycle, which after some quick searching, is a common fault when the heating element in the dishwasher breaks.
I initially contacted a local engineer who came round and after a quickish diagnosis confirmed the element was faulty - it had an open circuit across the terminals. Given he didn’t have the part he said that head office would quote for the part and further repair.
This came through almost immediately after he’d left - and it turns out head office put quite a premium on parts. The relevant heating kit was £66 (inc VAT) from the manufacturer, and they wanted to charge us £109 (inc VAT) for the part alone, plus the labour costs for returning to fit it.
So I thought I’d give it a shot myself - at worst I’d have a cheaper part and someone would come round and fix it, and at best we’d save some money and I’d learn something.
On my model the repair started with disconnecting the power, water input hose and waste water outlet. Then removing the lid (very easy - two screws at the back) and then front kick plate which lies parallel to the floor under the door (tricky - a single piece of white plastic clipped in at the top and bottom). This enables you to access a previously unreachable screw to take off the side panels (screws at the back, inside the door and behind the aforementioned kick plate). All whilst noting which screws go where as they’re different! With the sides off I removed a further plastic housing behind the kick plate (a couple of easy screws on either side).
With access achieved I laid the machine on its back and unclipped the plastic plate on the underside of the machine.
The heating kit removal itself is not too tricky - I found a youtube video of a different machine, but the same parts, which was a great help.

In a time when it can get a little depressing to be the product yourself with many free services on the internet harvesting your data and preferences, the availability of videos enabling you to fix stuff personally is a real bonus.
Before proceeding I unclipped the float sensor - it’s a piece of polystyrene in plastic housing that rises up if water pools at the bottom of the machine and turns it off - it's the part on the floor in the front of the photo above. Using plumber's pliers I freed the rubber hoses from the pipes by releasing the metal retaining clips, disconnected the electrical wires (no soldering or anything) before using a couple of screwdrivers to lift up securing tabs on the kit itself, enabling it to be turned and freed from the pump below.
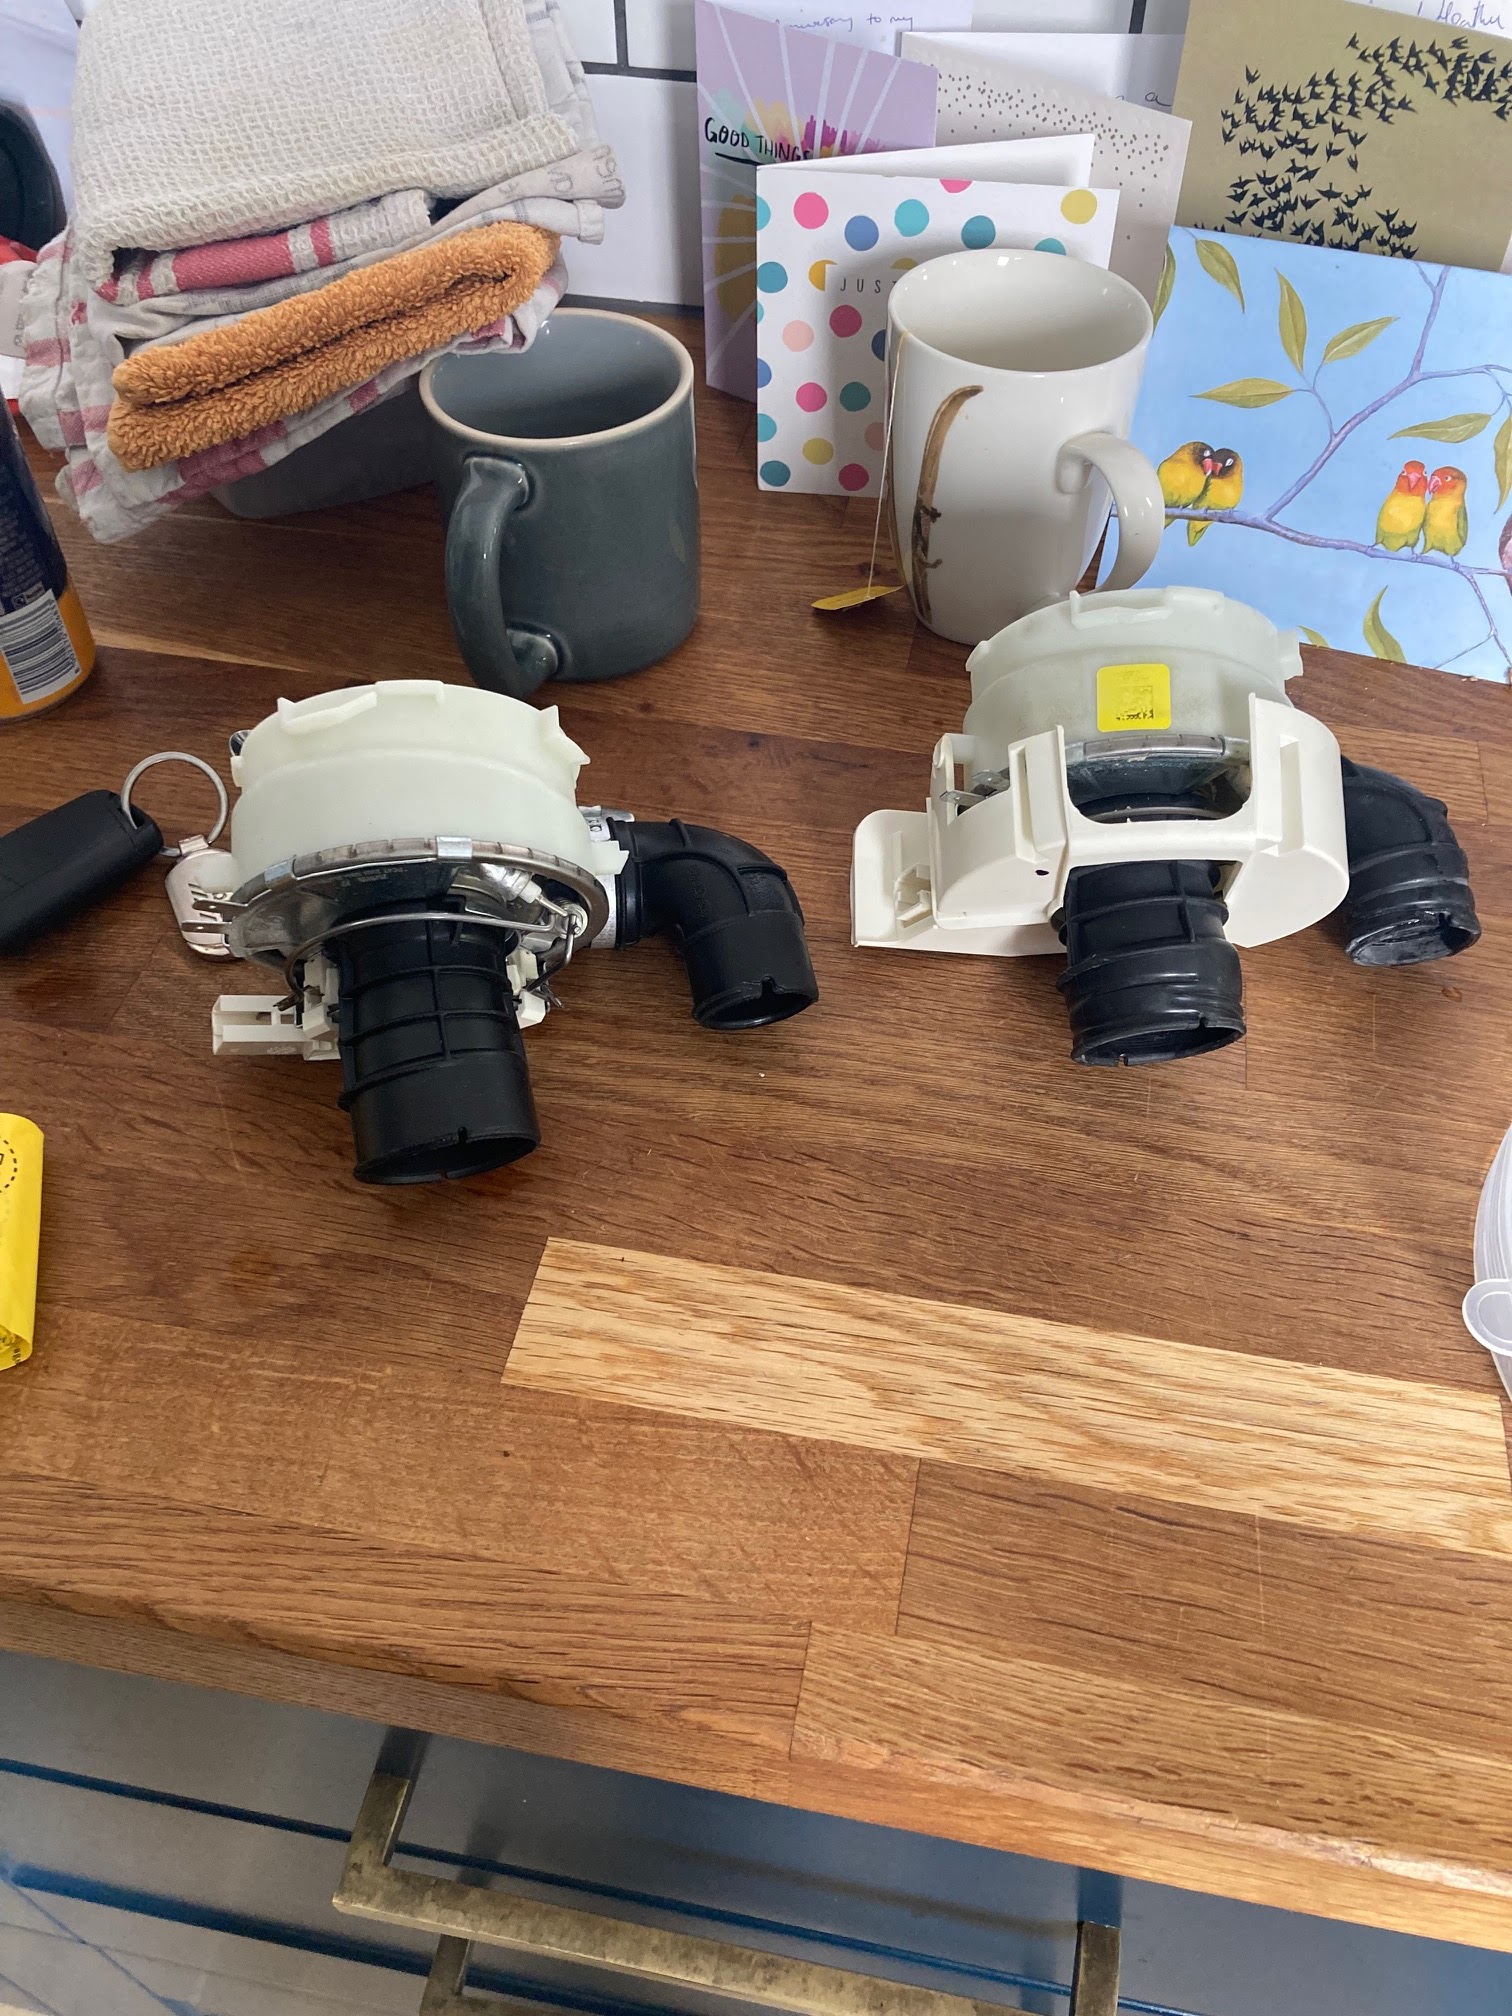
Here’s the old part next (right) next to the new one (left).
Fitting the heating element back in place was tricky. After remembering to include to new rubber O ring, I was a little flummoxed by a plastic guard safety guard which protects the electrics but limits access - visible on the old part above. Seating the element in the right position in the tabs to then turn it to fix in position, whilst also seating the rubber hoses back onto the pipes they feed to (helped by some positioning notches on each pipe), is very fiddly. But with everything looking secure, the hoses seated in the right notches, clips wrenched back into position and wires clipped back in it was time to reassemble, remembering to reattach the float sensor first!
It was much easier to put the case back together after that - and with all the relevant hoses plugged back in I ran a test.
SUCCESS!
Steamy plates after a quick cycle wash and vitally, no leaks! Still need to run it a few more times to ensure all is ok - but what a relief, and a sense of pride!
As a final note to this blog I probably wouldn’t have even attempted this without having watched others repair stuff online - here’s a few of channels I watch on youtube, focused on electronics, for a bit of ASMR relaxation. Big thanks to these guys for the inspiration!
https://www.youtube.com/c/adamantcomputers
https://www.youtube.com/c/StezStixFix
https://www.youtube.com/c/Tronicsfix
https://www.youtube.com/c/Mymatevince

Good job! It's great to be handy.
ReplyDeletethanks :D
Delete